Recipe: Chia Pudding
Post by Olivia Martino, Registered Dietitian and Owner, Nourish Northwest
Chia pudding is a versatile and easy recipe that we have made many times in our cooking classes at Nourish Northwest. It works well in our “Shake the Sugar Habit” class because can satisfy a sweet tooth, with very little added sweetener. We also make it in our “Cool Inflammation with Food” class and bump up it’s nutritional power with some potent anti-inflammatory spices, such as cinnamon and ginger. Today I am posting this for my spring cleanse group who I’m sure are looking for easy ways to fill up fast. This is a great satisfying snack that is good to always have on hand. But sorry cleansers, no added honey for you. It will still taste delicious and satisfying without it. Play around with adding some of the mentioned spices, or even cacao powder for a chocolatey treat. Enjoy!
Chia Seed Pudding
Total time: 15 minutes, plus 3 hrs chilling
Makes: 4 servings
Ingredients:
2 1/2 cups light coconut milk
3 Tbsp honey
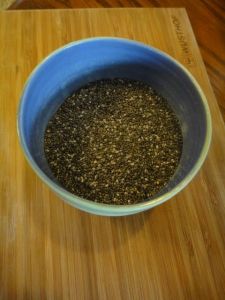
1/2 cup chia seeds
1/2 tsp lemon zest
Directions:
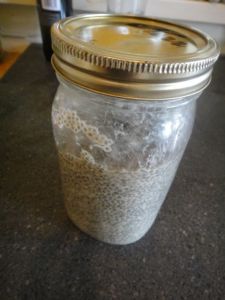
In a 1 quart jar, combine coconut milk and honey. Shake to combine. Add chia seeds and lemon zest. Close the jar and shake well.
Refrigerate until the mixture is very thick and pudding-like, stirring or shaking occasionally.
Serve the pudding in bowls with fresh fruit and/or nuts.
Recipe: Dinosaur Dill Crunch Salad with Lemon Tahini Dressing and Salt and Vinegar Chickpeas
Post by Olivia Martino, Registered Dietitian and Co-Owner of Nourish Northwest
Today is day one for our group of Spring Cleansers at Nourish Northwest. In an attempt to make it slightly easier for them, I am providing them with several recipes, so they don’t run out of options and their cleanse is as tasty as possible! Expect more blog posts than usual, as I will be sharing these recipes with everyone. The good thing about “cleanse recipes” is that they tend to fit every dietary need/restriction. Enjoy and good luck to the Cleansers!!!!!
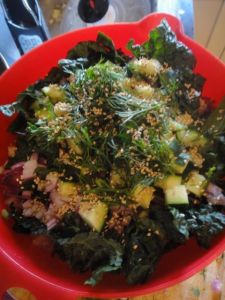
Dinosaur Dill Crunch Salad
From Ohsheglows.com
This salad is delicious as is or you can dissect it into parts. Just make the chickpeas for a crunchy snack, or make a big bunch of the dressing to top any salad with!
Makes: 4 servings
Ingredients
For the salt and vinegar chickpeas
- 1 (15-oz) can chickpeas, drained and rinsed
- 2 cups white vinegar
- few pinches of kosher salt
- extra virgin olive oil, to lightly coat
- 2 garlic cloves
- 1/4 cup + 2 tbsp fresh lemon juice
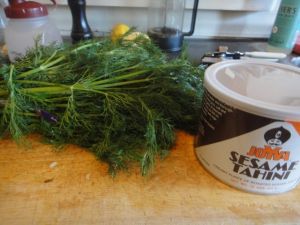
- 1/4 cup tahini
- 2 tbsp water
- 1 tbsp extra virgin olive oil
- 1.5 tbsp nutritional yeast
- 1.5 cups packed dill, stems removed and roughly chopped
- 1/2-3/4 tsp kosher salt, or to taste
For the salad
- 2 small bunches Dinosaur kale (also called Lacinato or Tuscan kale) OR 1 large bunch curly kale
- other greens if desired
- 1 English cucumber, chopped small
- 1/2 red onion, chopped
- 1 batch of Lemon Dill Tahini dressing
- few tablespoons of sesame seeds, toasted if preferred
- 1/2 batch of Salt & Vinegar chickpeas
Instructions
1. Salt and vinegar chickpeas: Preheat oven to 425F and line baking sheet. In a pot, bring 2 cups white vinegar to a boil and add pinch of salt. Add in drained and rinsed chickpeas and bring to a boil for 1 minute (no longer). Turn off heat and let the chickpeas sit in the vinegar for 30 minutes. Drain the chickpeas, place into pot, and light coat with a tiny bit of oil (optional) and a few sprinkles of kosher salt. Place on pan and roast for 35-40 minutes at 425F, until golden and crispy. Halfway through baking, give the pan a shake to rotate the peas. Keep an eye on them to avoid burning. Leave on pan until ready to eat. They are best served fresh as they get soft when stored.
2. Lemon Tahini Dressing: In a mini chopper or food processor, mince the garlic. Now add in the rest of the ingredients, except for the dill, and process until smooth. Give the dill a rough chop and add into processor and process until smooth. Should keep in an air-tight container for 5-8 days in the fridge.
3. Salad: Prep all salad ingredients and add into a large bowl. Massage your desired amount of the dressing into the leaves and let it “marinate” until ready to serve. Add roasted chickpeas on top along with a drizzle of more dressing and sesame seeds.
Mindfulness and Meditation
Post by Olivia Martino, Registered Dietitian and Co-owner of Nourish Northwest
“Spring” in Portland feels like a state of limbo to me. We’re neither in winter or summer. Some days it’s rainy and some days it’s sunny, and I just can’t seem to get dressed for the day appropriately (I’m wearing rain boots today and the sun is out). I can’t figure out when to plant my garden. I’m mostly feeling stuck and uninspired in the cooking department. Do I continue to eat hearty winter greens? Do I want warming soups or colder salads? To gather inspiration for cooking ideas, I took a look back at my old food blog that I am no longer keeping up to see what I cooked last April.
The first recipe that came up was the first meal I cooked in my new apartment in Portland. I had just finished unpacking my kitchen boxes after their long journey from Louisville, KY. Thinking back to where I was last April brought back a flood of emotions. Last spring and the year that followed has been a huge period of transition in my life. From saying goodbye to a life in another place, ending a meaningful relationship and grieving the deaths of two friends to starting a new business, rebuilding old friendships and forming new ones, welcoming a nephew and preparing for another baby, this year has been a roller coaster.

Many people reflect on their lives in January, when making New Year’s resolutions. But I think spring is a good time to really think about what you have been through, where you want to go and how you are going to get there. As a dietitian, I talk with clients a lot about Mindfulness. Mindfulness, according to Buddha, is one of the seven factors of enlightenment and is defined as the attentive awareness of the reality of things around you. I often relate this concept to food and eating. Being mindful of the food we purchase and put into our bodies connects us to nature, the seasons, and the food itself. The Farmer’s Markets just opened, so now is a great time to visit one and see what is in season right now. Being mindful when we are eating allows us to slow down, taste and enjoy our food and in turn, be satisfied with less. When I feel confused about where my life is, I like to practice mindfulness in all areas. To me, this means going on a walk outside, doing yoga, reminiscing with old friends and practicing mindful eating.

Mindful eating, in a nutshell, is paying attention to your food. This means thinking about what you are going to eat and planning your meals ahead of time, focusing on the food and freeing yourself from other distractions. It also includes being aware of your physical surroundings and emotional state. Where are you eating… in the car or at the table? Why are you eating… because you are bored? sad? happy? hungry? It is also important to think about how the food makes you feel. Does it energize you? Or does it make you lethargic? Does it make you smile? Or make you feel a sense of guilt? Do you feel pleasantly satisfied? Or so uncomfortably full that you can’t move?

Some people roll their eyes at the thought of practicing Mindful Eating, or they simply feel that they do not have enough time. If you are trying to make healthy changes in your eating habits this is a crucial step. I am reminded of a story that was told to me by a teacher. He had a client that had a ritual of eating two McDonald’s cheeseburgers and a chocolate shake in his car on his way home from work every day. He was willing to make other significant healthy changes in his life but would not budge on this one. It was his ritual and he simply was not willing to let it go. “Ok fine, ” said my teacher. “You don’t have to stop eating the cheeseburgers but do one thing for me. Pull your car over at a rest area and eat your food there.” The client agreed. The following week, my teacher checked in to see if the client had done his homework. The client reported back that he had and he realized the funniest thing… he hated the taste of McDonald’s cheeseburgers. Hated them. He just never actually taken the time to pay attention to how they tasted before.
Here are some tips for implementing the practice of mindful eating into your daily life:
- Plan ahead: Plan your meals for the week, make a grocery list and stick to it. Prepare your meals and snacks ahead of time
- Set aside time for meals: Schedule it into your calendar if you have to. This is a crucial part of your day.
- Free yourself from distractions: Turn the tv off. Turn the computer off. Put your phone away.
- Use your five senses to examine your food: Taste, Sight, smell, possibly hearing and touch
- Chew your food thoroughly: this means 25 chews for each bite. Chewing makes the food more digestible, draws out the nutrients, lets you taste your food, feel more satisfied and gives your body a chance to feel full.
- Most importantly, no matter what you’re eating, enjoy your food!
Recipe: Black Bean Quinoa Burgers
Post by Paula Jahn, Co-owner and Dietitian at Nourish Northwest
With less than two weeks until my due date, I have the sudden urge to stockpile food. Maybe it’s the nesting instinct, or maybe I realize that after the flood of post-baby casseroles, I will be left to my own devices. I’ve always been really good at suggesting this to busy clients, but bad at implementing it myself. In fact, I made these delicious veggie burgers with a client last week and told her that these are the perfect make-ahead-and-freeze burgers. Time to take my own advice.
First, rinse and cook the quinoa. I like the mindless “pasta method”: Just boil quinoa in plenty of salted water for 15 minutes and drain.

When the quinoa is done, a little tail or Saturn ring will pop out and the center will no longer be opaque.

Chop up an onion, garlic, and some oil-packed sun dried tomatoes. Sauté until the onion is soft, then add half of the black beans, spices, and a cup of water.

Add this mixture and half of the cooked quinoa to the food processor.

Mix together the rest of the black beans, quinoa and the pureed mixture. Cool.

Once the “dough” is cooled, drop them on a cookie sheet lined with parchment paper. These are too sticky to form patties with your hands. They will firm up in the oven.

Put the patties in the oven and bake for 20 minutes on one side. Turn the oven up to 375 degrees, flip, and bake another 10 minutes.

Top them with your favorite burger accessories. Yum!

To freeze, layer them in a freezer container with sheets of parchment paper between each patty.
When the last bite of chicken and rice casserole is eaten, I know that I can pull one of these burgers out of the freezer (no need to thaw overnight!) and have a healthy start to dinner. While I have no idea what it’s like to juggle a newborn and cooking dinner, I do know that good nutrition is essential during breastfeeding. These burgers put my mind at ease knowing that they are an almost instantly available source of high quality protein, fiber and complex carbohydrates.
RECIPE
Black Bean Quinoa Burgers
(Adapted from vegetariantimes.com)
Serves 6-8
½ cup quinoa
1/2 onion, finely chopped (1 cup)
1 Tbs olive oil
1/4 cup sun-dried tomatoes in oil, finely chopped
1½ cups cooked black beans, or 1 15-oz. can black beans, rinsed and drained, divided
2 cloves garlic, minced
1 tsp chili powder
1/2 tsp smoked paprika
1/2 tsp freshly ground black pepper
Pinch of cayenne pepper
Salt, to taste
6 whole-grain hamburger buns
1. Stir together quinoa and 1½ cups water in small saucepan, and season with salt, if desired. Bring to a boil. Cover, reduce heat to medium-low, and simmer 20 minutes, or until all liquid is absorbed. (You should have 1½ cups cooked quinoa.)
2. Meanwhile, place onion, olive oil, and sun-dried tomatoes in medium nonstick skillet, and cook over medium heat. Cook 3 to 4 minutes, or until onion has softened. Stir in ¾ cup black beans, garlic, spices, and 1 cup water. Simmer 9 to 11 minutes, or until most of liquid has evaporated.
3. Transfer bean-onion mixture to food processor, add ¾ cup cooked quinoa, and process until smooth. Transfer to bowl, and stir in remaining ¾ cup quinoa and remaining ¾ cup black beans. Season with salt and pepper, if desired, and cool.
4. Preheat oven to 350°F, and line a baking sheet with parchment paper. Shape bean mixture into 6-8 patties, and place on prepared baking sheet. Bake 20 minutes, or until patties are crisp on top. Flip patties with spatula. Turn oven up to 375°F bake 10 minutes, or until both sides are crisp and brown. Serve on buns.
A Dietitian’s Perspective on Wellness
As a dietitian, I am in a specialized field of wellness. It is common as an expert in the field to emphasize nutrition as the priority. This bias is arguably necessary in order to help clients with food issues, just as other health professionals must view wellness through the lens of their respective specialties: mental health professionals, massage therapists, naturopaths, spiritual leaders, occupational therapists, etc., all have a slant. However, in my quest to counsel and educate clients in a holistic manner, it is imperative that I acknowledge and nurture all dimensions of wellness with my clients.
There are many different lists of the areas of wellness. I am partial to this list, put out by several universities: Seven Dimensions of Wellness

Nutrition falls clearly in the physical dimension. In order to become and remain well, one must maintain a healthy body by eating a balanced diet. Without physical wellbeing, it is difficult to achieve many of the other areas of wellness. It serves as a sort of baseline for wellbeing. It is important for me (and any nutrition professional) to remember that the edges are fuzzy around food issues. For example, where one shops for food is part of environmental stewardship and food choices are often motivated by emotional or social situations. This is why nutrition professionals must discuss each area of wellness with their clients. I have clients who seek dietary counsel to receive a prescription for wellness through food alone. “Just tell me what to eat to be healthy.” While I certainly could write out a meal plan that may improve physical health, if it does nothing to integrate the other areas of wellness, I have failed the client.
Fulfilling all dimensions of wellness is a personal and individualized journey to a balanced life. I know that I tend to neglect some areas. I fixate on physical wellness; if I am eating well, exercising and free from illness, then I am well. I forget that an important aspect of my spiritual wellness is having time alone in nature. A simple walk outside by myself nurtures my spiritual needs and is a practical step I can take each day.

Everybody has a unique way of honoring the areas of wellness. What is important is that they are identified and that active steps are taken to attain them. Achieving wellness is a process that relies on being aware and making choices that lead to a more balanced life.
What are the areas of wellness that need some attention in your life?
